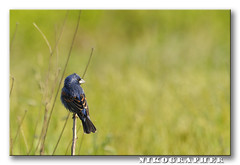
I was editing this photo, and thought to make it in to a quick guide to using selective sharpening.
This is the original photo with a crop already applied of a Blue Grosbeak taken at Bombay Hook NWR in Delaware. The original uncropped image was basically a bulls-eye composition, so I cropped it to place the bird off center and add room for the bird to be looking in to.
The first thing I did to edit it was adjust the levels a little moving both the white and black points towards the middle...
Next I made a copy of the image with the levels adjusted, and made a new layer out of that. I applied some Unsharp Mask (rough settings of 100, 1.5, 0) and then some Smart Sharpening. The problem with doing this across the entire image is that the background gets very grainy. It's already blurred and out of focus, so trying to sharpen it doesn't help at all.
So, the trick is to then add a layer mask to the layer that has the sharpening on it. Add the mask, fill it with black (click on the mask part of the layer, Shift-F5, select black,, hit enter.) This hides the entire layer. Then zoom in on the bird, and select the paint brush and the white color. Then you paint white in to the mask to reveal that part of the layer. All I wanted sharpened was the bird and the branch he was on. So, without any other layers visible but the sharpened one it would look like this with the mask applied:
(the mask can be improved here to reveal less of the background around the edge of the bird, but I did this quickly, and it probably looks fine. If I was going to print this I'd probably have refined the edges of the mask.)
Finally, making the lower layer visible (the one with level adjustments, but not sharpened) visible you get to see the soft background, and the sharpened bird.
This is a fairly simple technique to make part of an image sharper without changing areas that don't need the sharpening. Similar masking techniques can be used for a variety of things: selective contrast, selective lightening or darkening, etc.
With the images that I post I'm more likely to do selective levels adjustments, but this is a good technique and is worth keeping in mind when trying to post process an image.
View the final image posted here:
-Jon
![]()
Tuesday, May 13, 2008
Photo Edit Technique - Selective Sharpening
Labels:
Editing,
selective sharpening,
sharpening,
technique,
USM
Subscribe to:
Post Comments (Atom)


2 comments:
Hey Jon this is a good technique and thanks for sharing the wealth of knowledge.
I do take a lot of pictures similar to that and a lot of times and in my experice; I feel that it is really hard for me to get sharp pictures of small bird at a distance because the lens (my longest telephoto is (70-300) and the distance to the bird. the bird (subject) is usually small and when cropping and enlarging the image adds some grain to the image lossing sharpness.
I also learned that when making enlargements and getting the best results it is good to use the "Bicubic Sharper (best for reduction) option in the resizing window. you can also set this up under your properties so that it will always use this option when cropping or resizing.
Again Thanks for the very useful tip.
I will soon post some pictures of tree swallows at the Patuxent Wildlife Refuge using this technique.
Nice write up Jon. Good to see you've started up a blog. I'll be sure to subscribe and check in as regularly as my schedule permits. I look forward to more.
Regards
Jim
JMG-Galleries.com
Post a Comment