
I shoot a lot of images, and like to be able to process them quickly. Lightroom 2.x has a couple of features that make processing images fast a breeze.
After a few years of shooting mostly in Aperture Priority mode and praying I set the exposure compensation correctly for unpredictable subjects like eagles and hawks, etc - I now shoot 99% of the time in full manual exposure mode.
The 1% not in manual mode is for bracketed shots to be used in an HDR where I fall back to aperture priority mode to get a good center frame and +/- ones around that middle camera metered shot.
Anyway, the main benefit of manual exposure mode is control over exposure, and this works well since the light usually doesn't change as much as the subject or what's in camera view. The best example of this is a bird with sky behind him that then suddenly has tree/foliage behind them. A camera will meter those differently and good luck with that. A properly set manual exposure will yield much more consistent results.
read on for more.
It was around a year ago that I started to shoot manual mode (mostly) and I think it helped a lot in this sequence:
all sky bg
trees beginning to be in the shot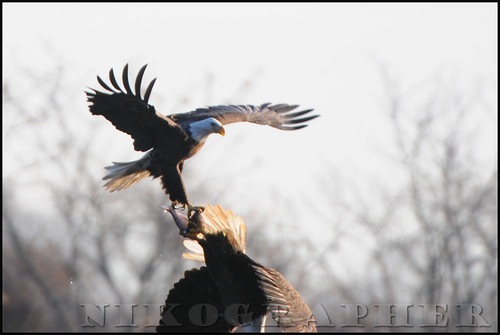
finally nothing but tress/dark in the bg
Hopefully that example shows off how manual exposure can really help out for action sequences with changing backgrounds.
The benefit of manual shooting doesn't end there though. In manual mode the exposures are much more likely to be + or -, and color balanced (or mis-balanced), pretty much to the same degree for a sequence of shots. They might all have a blue cast, or all need some highlight recovery or all need to be boosted +0.4 exposure wise, etc.
The way I like to edit my photos is in two main stages, where the first stage is to put on a decent but not super refined edit on to ALL my images that I'm working on usually from a day or a trip. Then once I export the edited images, I review them and pick the ones I like and then further edit them, or even re-edit them from scratch. So, doing the first part fast is important especially since I might be editing 50 images I will never use for each one I do use.
So here are the two ways to speed up edits in Lightroom:
1) Edit the first image in a sequence and get everything just right. This includes exposure, white balance, highlight recovery, tone curve adjustments, saturation and clarity... Then do a Control-Shift-C and select everything except the crop part. Now cycle through the other images and when one looks like it needs an edit do a Control-Shift-V to paste all the settings from a moment ago. When the images are shot in manual mode this pasting of settings works pretty well. If the camera had a chance to meter things, it will be less effective.
OR
2) Do your edits in lightroom as you would already do, and when you get to a new image in a sequence edit it (as above, exposure, color, etc) and then at the same time, with the original image still selected, select all the next images in the sequence (shift select) and click the Sync button.
An alternate to this method is to do edits, and then click through to next images, and when a similar image is found, or one that deserves editing is found maybe 5 shots later, click back to the edited image 5 shots ago, then click the newer shot and you can hit the Previous button and it will basically sync or paste the settings from the previously selected image even if that image is not directly adjacent to the image you want to edit. I hope that all makes sense.
And to speed up the processing part I apply changes to images with a mixture of the above techniques and add them to my Quick Collection (hit B), and when I get a decent number of images waiting to be exported I then view just the Q Collection (Ctrl-B), then hit Ctrl-A to select all those images, then hit Ctrl-Shift-E to export. Then the exports start. I then either select File>Clear Quick Collection, or I hit Ctrl-Shift-B to do the same. Now the exports still are happening in the background and I can start to build up my list or group of images to be processed next.
My computer is pretty fast, so it can handle lots of things at once. (It's an AMD phenom2 Quad-core 3GHz processor with 8GBs of RAM.)
--
One modified way to do the sync'ing of settings is to include the crop part. This works ok for birds that are not even close to filling 20 or 30% of the frame, since most of the pixels need to be cropped out. Bird placement can be updated on each image after it is synced.
--
Another cool feature is the virtual copy one, where you can do all sorts of edits to a source file. Then create a virtual copy and you can try something totally different without destroying the first edit.
--
And finally when it comes to RAW vs. JPG I am 100% fully converted to shooting ONLY RAW and NO JPGs. It wasn't until I used Lightroom that I found the ease of processing RAW files to my liking. To me Lightroom is an UBER RAW processing tool plus file management. It doesn't replace Photoshop. For me it replaced a broken Picasa for file management, and the inferior JPGs that suffered from exposure problems and unrecoverable white balance settings. The funny thing is that I was happy with the JPGs for a long time. And I am happy to have shot that way since it made me work harder to get the exposure right (as if I learned with film) and to try to get the WB right as shot as well. Now that I can do that fairly well, the benefits of RAW are great - (change exposure, white balance, highlight recovery, saturation adjustments, etc, etc, etc).
-J
![]()
Monday, November 2, 2009
Bulk Photo Editing in Lightroom with Sync & Previous and Copy & Paste Settings
Subscribe to:
Post Comments (Atom)


0 comments:
Post a Comment