
I use the AF-finetune to calibrate my lenses and cameras. Usually this works out pretty well. Calibration will set the camera to not front-focus or back-focus, the focus will land where you want it - on the spot where focus was attained.
What I have found almost all the time when shooting birds in flight is that focus is harder. Sure, nothing news worthy there.
But what is most frustrating is when a bird is flying at the camera focus is rarely on the eye. And it is because the eye is rarely in the center of the frame where the selected focus point is most likely to be.
I've speculated and toyed with changing my AF-finetune specifically to be setup for this type of bird flight shot, but it is rare that I do it. The setup is to change focus to bias towards front-focus. With the birds flying at the camera, and the head likely the closest part of the bird, you want focus to be closer than what you will normally get.
So, I rarely do it because how many flight shots towards the camera in a row do you get and if it is just a few is it worth blowing all the other shots?
On this day I was shooting the Herons as they were nest building and they kept flying a similar route.
I got some of the best focus in this setup than I have ever gotten before... Normally my lens (600mm f/4) is set to about -14AF I think, and I changed it to -18. I tried a few settings, and the following weekend I tried with my 500mm and experimented more. I got better results with the 600mm at about -4 on top of my normal calibration.
Have you ever tried this technique?
Or are you already happy with your birds in flight towards the camera shots - so no need to tweak this setting?
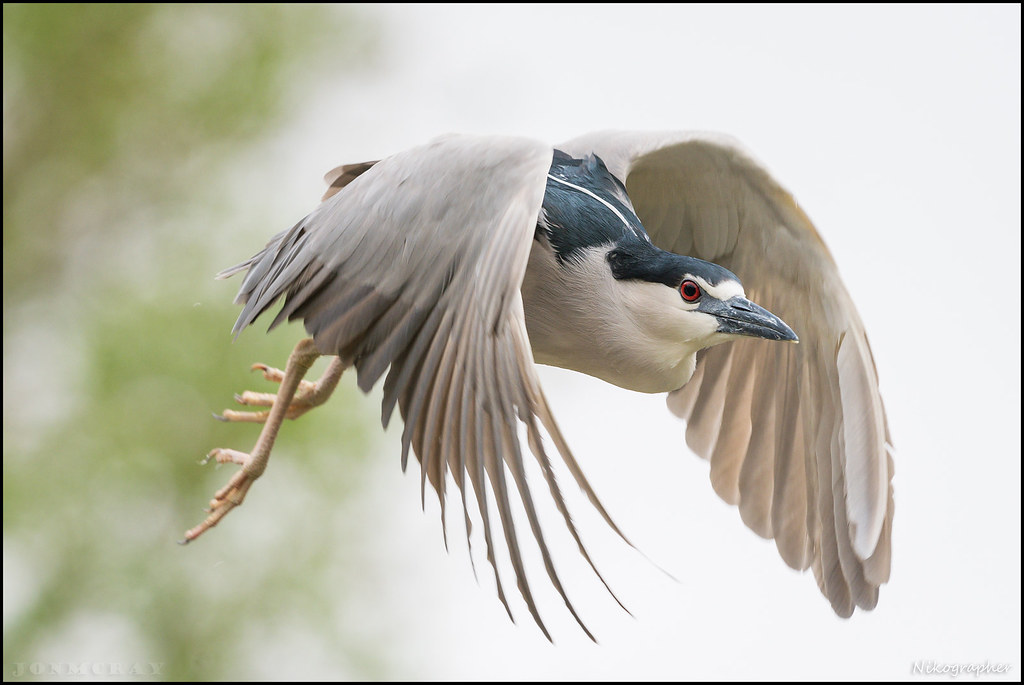
Updated with another shot from this day
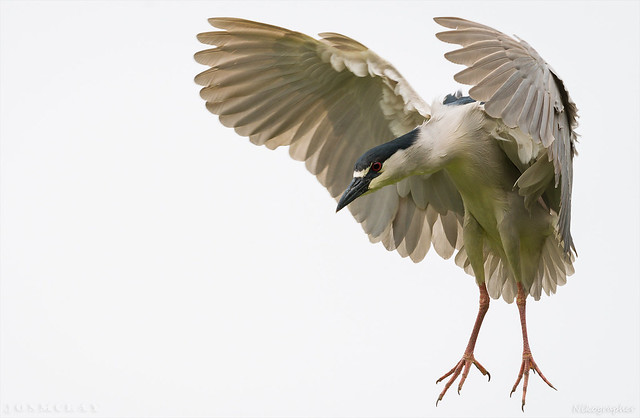
-Jon
Read more On "AF-finetune for Subject and Shot - how to get better focus for birds in flight (towards the camera)"!
Tuesday, April 25, 2017
AF-finetune for Subject and Shot - how to get better focus for birds in flight (towards the camera)


Sunday, December 25, 2016
EOY Thoughts on Seeing Differently Not Just Shooting Incrementally Better
My long time approach to making images has been to shoot, review, pick the best shots, and then try to do better the next time.
The next time I might have the past images in mind and I might try to reproduce the best images, with something new or with some element that was missing added this time. Or maybe the next time I remove something that took away from the past images.
To me this is the standard approach. And it is the kind of process that is needed to learn how to take or make better images in a large variety of circumstances and for a variety of subjects.
There are so many things to learn about gear and settings. For example just coming up with when and if you want to shoot in manual mode or one of the auto-exposure modes takes time. I shoot in a few different modes but mostly manual exposure with auto-ISO. But there are still some times when manual ISO and manual exposure are better. I like using auto-ISO when the light and conditions change a lot and dialing in some exposure compensation to adjust the exposure is easy to do. Other times when the light is consistent, and the subjects are consistent going full manual can be better. This allows for tighter control of the exposure and less variation, and I can try for more specific/artistic images.
Regarding exposure, picking shutter speeds for shooting can have a huge impact on the images and what is recorded, not just if the subjects are sharp enough or frozen given their speed and the size of the lens. For this setting, there is the basic approach of calculating all the component parts of the setup and then trying to freeze the action. Fast moving subjects - faster shutter speed. Longer lens - faster shutter speeds. Hand holding the lens - faster shutter speeds. That's the basic math to be taken in to account.
But the more advanced thinking would be to not just respond to those and only try to freeze the action, to make simply a sharp image with a frozen subject. Years ago I remember seeing this panda photo shot my Nick Nichols and thinking that I was unaware of so much that goes in to a good image. It was taken with a long lens, in what I would now consider challenging light and shot with a slow shutter speed. This informs me now about how those early simple rules for photography are a good starting point but to make better images I need to keep pushing.
Here are some examples of images that use blur/slow shutter speed for positive effect:
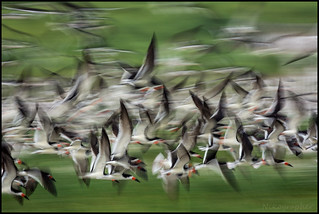
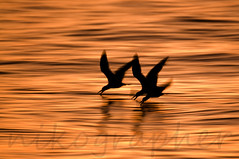
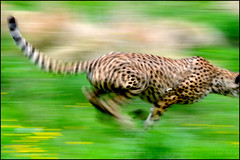

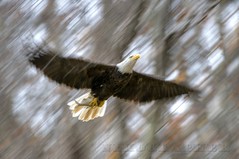
Realizing that the rules for sharp images are not rules to blindly live by has helped me grow. Of the above images all are off a tripod with the intention of making the resulting image except for the last one of the eagle which was a 'happy accident'.
Capturing animals with some motion helps to bring them to life in an image that otherwise might be frozen and lack that feel. Going back to that panda image - seeing some motion can really help bring more to a photo.
Capturing images that work with blur can be pretty difficult though. Things that contribute to a motion blur image not working well are: too much blur, nothing being sharp, having to stop down the lens too much and seeing tons of sensor dust, the blur not going in the right direction due to imperfect panning technique, etc.
So what's the next technique, the next default thought process to get rid of or to question? I have done a short project I called "going vertical" where I shot vertical composition for a while and that helped to break out of the way I was almost always shooting with the camera held in landscape/horizontal mode... I even shot a vertical video...
IDK what's next. Not shooting from eye-level is another approach to take. It is easy to stand and shoot from that position. Or to setup a tripod at eye-level and shoot from there. But shooting from lower, or as low as possible really makes for a better/different perspective.
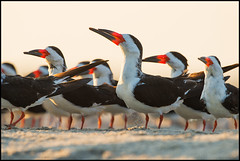
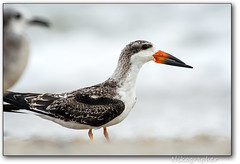
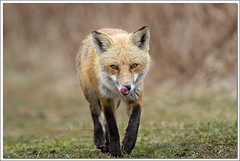
Another norm or standard that I've noticed was worth reconsidering is that of hoping for 'good weather'. I now consider good photography weather usually anything other than clear blue skies or overcast and rainy. As a result I like some overcast, or some clouds, or some rain and storms, or cold weather and things freezing or hot weather and animals that might be reacting to the weather... This summer I specifically went to shoot osprey on 2 of the hottest days in order to see the birds hot. It is harder to shoot on these types of days, be it hot or cold. It takes preparation, and the right approach to pull it off successfully. One of my go to things to help in all kinds of weather or times of year is to keep a case of bottled water in my trunk. Being thirsty or dehydrated is easy to let happen. But it is one of the simplest things to control when shooting and so many things aren't controllable. It's just like always trying to be well fed, and to have ample snacks that are high in protein and good for me. I often will do a day trip on a Saturday and drive 200-500 miles round-trip, where I get up a couple of hours before sunrise and get somewhere good, and then shoot all day and then drive home. And then doing the same or similar the next day, on a weekend when most people might be resting, sleeping in and recovering from a hard week of work - to do it my way takes planning and execution.And being more prepared allows for something to not go my way, and not really be that bad or wreck a day of shooting.
So what's the next thing to mix it up and bring my photography to a new place?
I'm going to start 2017 by going West to a place I've never been, to shoot animals and landscapes I've never seen or shot. I'm trying new things.
With the change in the year, I want to... think like I did at Kenilworth Aquatic Gardens when I went a half dozen times this summer. I went, and went, and got the images I had defaulted to, and then I started to explore more and try for different images and I think I captured my best images of the Lotus Flowers. I've posted a few myself, and shared many more with Tara Brach to use with her talks and meditation posts.

I wonder what it would take to quickly see the default program running, the program that tries to get me to make the same images again, to see the way I have seen before and repeat things. I wonder if there are ways to do less pattern matching and finding less comfort in the old, and seeing new and fresh, quickly or quicker...
I'm going to try new experiences, new locations, new approaches when I can, and I'm going to try to advance my photography and not just make 'sharper images' but make new and different images.
Happy New Year.
-Jon Read more On "EOY Thoughts on Seeing Differently Not Just Shooting Incrementally Better"!

Wednesday, October 13, 2010
Play the Seasons and Learn
From http://natureandwildlifephotography.blogspot.com/
You can't fight it, you have to go with the flow. Let the salmon go up river to their death, struggling to survive, but as a photographer - learn the seasons, research the places, scout them, make friends, make visits, and over time get to know places and what works best.
I guess in a nut shell that's what I've been doing for a few years or more. Traveling mostly a hundred miles this way or that way, and when it works well either learning about a location or getting some good and new images - and on the really good days both. A day with learning but no stand out images, that's still got to be counted as a success.
Cape May New Jersey is sort of my new favorite place. Last year I went a couple times, but this year I am even more in to it.
Having gone to spots here and there at Cape May and tried sunrise or sunset at a few spots I now have more info and more local knowledge. The folks that live nearby, or visit lots, they know what's up - and it can largely be a matter of asking, and also trial and error.
The hawk landed on that fence post - I was just 20 feet away, and when I moved the camera over and started to shoot he saw me and flew off a moment later. That brief encounter, what it really highlighted for me was - hawks will do anything and land and then scan the area - IF they aren't spooked off to begin with. I was there already, but when I moved and focused on him, THAT bother him.
So, that was a couple weekends ago. What happened a few minutes later was a group of ~15 birders came up to the spot near me, and walked up and started looking around. Needless to say, no more hawks landed on the fence.
A week later I was back and it was like ground-hog-day, but I had just a little more info. I was at a similar spot along the dune and the hawks were all over the place, and migrating, and flying mostly south.
What I tried differently was to not be in a spot so often traveled by people. It was still pretty close to the beach, at a dunes spot, and basically equally good for hawks.
Here's the spot I picked and how I setup with some cover. Having shot a few places where I just made the seemingly minor choice of picking some cover to try to blend in with, it really made a difference. 
The thing about shooting raptors flying by close and fast though is that shooting from a tripod - that's not so good. I couldn't move around and adjust fast enough. I wound up hand holding most of the time. I'd rest the camera and lens on the tripod, and then when something was approaching I'd hand hold the camera and get ready...
What actually happened next THREE TIMES though was I was too hidden, I blended in too much for my own good. Last year I got a camo coat, and hat, and have wrapped my lens in camo too. So, THREE times at this *other* spot a hawk landed on the fence post, so close that by the time I reached for the camera and began to adjust and move to just begin to PREPARE to take a shot, the hawk was so spooked by my new found presence that it took off before I even came CLOSE to getting a shot. Three times. Once the hawk was just on right of that tall grass perched on the fence maybe 4 feet from me and the camera.
Sigh.
So, I tried to learn from that, expect things, and plan and move around differently... It didn't quite work out, but I think if I had done what I did later during the earlier encounters, it could have worked. So, for me, I learned and will try new things next time.
-
One of the great things about this time of year and Cape May also is that there are so many knowledgeable and friendly people there. In just a few visits this year, I really learned a bunch already. I will still basically say much of the bird IDs I tell people are "guesses" because I know I have so much more to learn, but, with hundreds of raptors passing by, often per hour, I kind of feel like I know more every day of every visit I'm there.
Taking time to blend in, dress right, move slowly, and predict things is something I've picked up more in the past 2 years I'd say. It's like being a hunter... The input influences the output. If you don't know what you're doing the best you can hope for is being lucky. But there more you know, the more you can predict, the more you can steer chance in your own favor.......
Find spots and go with the seasons, learn the lay of the land, patterns, and NEVER be afraid to get info from a local or fellow visitor.
-Jon

Thursday, September 9, 2010
A Photo Edit - Black and White Red Fox
From http://natureandwildlifephotography.blogspot.com/
I've meant to do more posts like this one. A quick take on the edit techniques used to process an image. Doing this for a straightforward image with little edits doesn't offer much. But for many images that I make there's a decent distance between what the camera captured, and how I've interpreted it, edited it, and then produced the final image.
Here's a composite with the final image on top. The bottom two images are from the raw file and are the basic images, reset to defaults in Lightroom and then color (default) and grayscale.
One of the main problems with the source image was it wasn't that sharp. It was the sharpest of the bunch from the encounter, but at 1/30th of a second at f/4, and a mix of handheld and resting on my car window/beanbag - it was hard to get a sharp shot.
color/default-raw
The sharpest part is his nose, and the DoF falls off pretty quickly. As a straight color image his eyes and attention are gripping but the image itself isn't refined enough in my opinion. The above is overly flat due to no processing, but shows signs of animal behavior and intent and that'x what drew me to the photo/moment.
Default/Grayscale
Switching to grayscale removes color and distraction, and elements that might make the mind wander. Color is a strong element on its own but for this image I really wanted to narrow the scope of it to just the fox. Converting to black and white, even though I have black and white on the brain lately, was probably a very justified move.
OK - so that's the setup. That's what I had to work with. I had seen the fox and due to the low light was shooting at pretty slow shutter speeds and wide open. My personal preference is to shoot wide open at ISO 400 and SLOW shutter speeds and let the cards fall where they may on sharpness. I don't always stick to this rule, but I try to avoid shooting at any ISO above 400. There's something about my D300 and D300s that ISO500 or beyond, just make me concerned regarding noise.
Anyway... I've been reading a book. I got it probably a year ago and just picked it up again. The book is Vincent Versace's "Welcome to Oz". In it he describes using Photoshop to turn a source image in to an artistic vision, an interpretation, something where the source file is just the starting point.
I highly recommend everyone listen to this podcast with Vinny (as I hear he's called).
Some of the concepts he talks about are how the eye moves through an image - light to dark, high contrast to low contrast, etc, etc..... Things that make sense but not what you might be concerned with when processing an image where you are really trying to (for me anyway) showcase a subject (often an animal) and show to others what you see.
So - here's the final black and white edit. This was done in Lightroom, and I used the adjustment brush a few times with different levels of lightening and darkening.
A few key edits I did were to darken the image and edges, and brighten the eyes and his nose. I also darkened the original bright spot on tht http://natureandwildlifephotography.blogspot.com/e right. Having done that edit, I removed some noise in PS with D-fine, and added my logo.
It's fine to want to get it all right in camera and I shoot for that too. Heck I shot jpg for like 3 years! Now that I shoot RAW and manual mode I strive for getting the source file as good as possible. However there's often much more to an image than that.
Let me know what you think. I'm not looking to stir up the purist's who'd capture it in camera and do NO edits ever... What do folks think about editing images to enhance and convey, and make an image become an artist photo?
-Jon


Monday, July 5, 2010
DC Fireworks July 4th 2010
From http://natureandwildlifephotography.blogspot.com/
Yesterday was the 4th of July and I made my second serious attempt to shoot the DC fireworks.
Like any major event downtown or nearby Washington DC it takes the right mindset and a plan to avoid unplanned pitfalls or something which might make the night a bust. For the 4th of July the things to plan for are the spot to shoot from, transportation to and from there, and having the right gear and supplies to make it somewhat comfortable. I was leaning towards trying to shoot from near the Iwo Jima Memorial and did just that. I started surveying the area, road closures, access to various places around 1PM - a full 8 hours before the fireworks. I parked in a grassy area setup by the park police near the entrance to Arlington National Cemetery when heading north on the George Washington Parkway. By 2:30 or so I had walked to the Iwo Jima Memorial and picked a spot in the shade to wait and finalize my plans from. By around 7PM the area started to get fairly busy and I picked my final spot - where I took this shot looking back up the hill from.
For supplies I packed a Gatorade, 4 frozen waters, a soda and some trail-mix.
read more...
For gear I packed my D300 and D300s, 80-400mmVR and 18-200mmVR and my two tripods. I also had a cable release and stereo microphone. Last fall I got a VariND, a variable Neutral Density filter and I brought that, and a circular polarizer too. I also brought a bag chair, and a couple of camera bags to carry the stuff in. In all I probably had like 30 pounds of stuff, maybe more.
I posted this one last night right after I got home. It might be the best of the night I got.
What Worked Well
The gear I picked was enough. Lol, I brought a ton, but I did leave another camera home (Fuji S5) and a video camera. Since I knew I'd be walking a lot and heading back to my car in the dark, I didn't bring my 200-400mm. It is a great somewhat fast lens but is huge and weighs a lot. The 80-400mm worked better because I had a ND filter for it, and could shoot long exposures without having to stop down to f/18 or more and go past the sharp range of the lens (and avoid highlighting dust spots on my sensor).
Part way in to shooting I had to adjust my exposures a bit and remembered something from a podcast I had just listened to regarding low ISO. Nikon makes the ISOs below 200 low-1, 2 and 3. The reason these are low is that below ISO 200 the camera doesn't perform as well, possibly with more noise than at ISO 200. So I adjusted my ISO up to ISO 200.
The VariND on the 80-400mm lens also worked well. I wound up using it to adjust my exposure once I was setup and rolling. I chimped some shots, and increased the ND a bit.
While reviewing last year's images I realized I was not zoomed in nearly enough. This year I made sure to try to get tighter shots, more full frame. Part of my thinking was that fireworks are set off all over the country, but the thing that makes seeing them in Washington DC so special is the surroundings / the monuments, the Capital Building, etc. I did way better than last year, but it wasn't until almost the end that I zoomed in on the 80-400 past around 250 or 300mm.
What Didn't Work Well
Operating two cameras led to many more shots than what I could have done with just one camera. However I think I did two things wrong. I had the tripods very close and touching eachother, or at least the stuff I had hanging from the tripods (to add weight) were touching. This led to shooting with one camera and adjust the other and moving that first camera a bit. I have some images that show movement in the camera.
I shot in manual focus on both cameras. This speeds things up, prevents focusing on close trees and makes for consistency. However, I didn't pay close enough attention on the 18-200mm and D300s and a large group of early shots are out of focus, focused closer than what I wanted.
Shooting two cameras at the same time isn't something I've ever done like this, so all in all I did ok.
What I Might Try Differently Next Year
Shooting from near the Iwo Jima Memorial was pretty cool. I got the shots I wanted and had planned for. Getting all 3 Washington icons in tight formation was what I'd seen in my minds eye.
Next year I might see about shooting from downtown DC or somewhere else. I've seen some shots from behind the Capital building looking west that were very good, and made the Capital build the major "dc" element...


Tuesday, September 2, 2008
A couple of different GBH perspectives
I'm in the middle of working on a wildlife presentation I plan to give in a couple of months to a camera club in my area.
I've taken a couple of passes at picking images, and well I've got a lot at the moment, just over 100. I'm not sure how long I'm expected to present, but I'm guessing it's around an hour or so. What I want to convey in the presentation is not camera technique, or just lucky snapshots.
Wildlife photography is about not disturbing the subject, and showing off a moment, which might just as well never been seen and still taken place. It's hard to find a balance between getting close enough for the image you'd like to take, and not causing a response in the animal/subject, ie witnessing a response to the photographer vs. just natural scene.
Read on for a couple of photos and quick stories related to this.
GBH close
The above image was a unique encounter. The bird was hunting in a small patch of water (ditch) along the Wildlife Drive of Blackwater NWR in Maryland. I suspect he was a juvenile, and not among the strongest. During a couple of passes along this spot, I photographed him from the car, and then later from outside on the road, not very far. What I think this photo and encounter shows is that not all animals behave the same, and sometimes you can get lucky.
Coming Towards me
This image pleases me on a few of levels. First, it was an overcast day, and I probably thought the light wasn't great. But it worked well. Second, the bird is flying from one fishing spot to another, as a result of competition from a second bird. And he's coming towards me, which is not something you get often with a Great Blue Heron... And lastly, the reflection and pose grab me as behavior and photographic magic that can't be planned for.
-Jon
Oh and here's a bonus video of red fox images, in case you missed it. It's one of my favorite image-montages....
Read more On "A couple of different GBH perspectives"!


Thursday, May 15, 2008
Nikkor 80-400mm VR - Get The Most Out Of This Lens
On flickr I get asked frequently about the 80-400mm lens, and often share info freely with other photographers. It's probably got something to due with the flickr tag and the rank of some of my images for the 80-400mm f/4.5-5.6D VR. 
Of the top 60 images currently only 9 are NOT mine. Anyway, I'm writing this as a resource for more photographers to hopefully benefit from.
I've heard that the Nikkor (Nikon) 80-400mm D VR lens is the first VR lens that made by Nikon. I've had it for about 2 years now, have probably taken over 100,000 images with it. (I've got 4 dSLRs and am at around 180,000 clicks or so.)
Before I got the 80-400mm and again after I got it I read some reviews from various sources. Some reviewers liked it, others hated it and returned it within hours because it is "soft".
My take on the lens is that for the money (well under $2,000 US) it is a great lens for many reasons. Read the rest of my review/guide for what works well (and what doesn't), and how to get the most out of this lens.
To start, here's how I normally setup and shoot with the lens.
In General
Hand-Hold
As of May 2008 about 85% of my images are taken hand holding the lens. About 13% of my photos were taken with a monopod, and the remaining 2% are from a tripod. So, mostly I hand-hold with the lens.
AF-S
With my both my D200 and D300 I mostly shoot in continuous focus mode (AF-C) and tend to use just the center focus point (with group assist on the D200, or 13 or 21 or whatever point assistance on the D300. I try not to be too caught up in the technical exactness, as you may have wondered from that last sentence....
No Filters
UV - For quite some time I have not used a UV filter on this lens. I have gotten a minor mark on the front element as a result, but you cannot see it in any images. A UV filter is only useful in my mind for a protective cover over the lens while you're not using the lens. While on the lens it will add another piece of glass that will degrade image quality and possibly affect focus.
Circular Polarizer - For quite a while I used a Circular Polarizer with the lens. But for about a year now I've not. The same problem as the UV filter applies (see above) but there's a much worse problem with the CP filter. It blocks two stops of light. That's how a CP filter works, it blocks light from certain directions, to produce its effect. A Circular Polarizer filter can be great for landscapes, or setup shots. But for tracking wildlife, getting focus on a moving subject, you lose way too much light to make the effect worth it. At 400mm the lens is at f/5.6. This is the standard minimum f/stop that Nikon cameras are rated for to get accurate focus. With the polarizer on the minimum f/5.6 goes to about f/11 worth of light. Expecting a Nikon body to track focus at 2 stops under its recommended rating is asking too much, even in decent light. So, ditch the polarizer!
The next set of things I do are based on the available light.
Poor to Moderate Light
The down side to this lens is that it needs light. When light's not that great I shoot close to wide open at f/5.6 or f/6.3 in Aperture Priority mode. Then to get a decent shutter speed I boost ISO. In these lighting conditions I might shoot at ISO 400 to ISO 1000, or sometimes even higher. If you're worried about noise, answer this: Would you rather have a sharp-noisy image or a blurred noise-free image? All things being equal I prefer some noise to some blur. So I make sure I am shooting at a minimum of 1 over focal length over (ie 200mm = 1/200, or 400mm = 1/400). One way to come close to this is to shoot in Auto ISO at the D200 or D300's maximum shutter setting of 1/250th minimum. When doing this I set the ISO to around 400, and then let the ISO climb as needed probably to ISO 1600. Here are two decent examples of this at work:
ISO 1600 @ 1/100 and 230mm
ISO 900 @ 1/250th and 400mm
Good to Great Light
When the light is good, the lens is at its best. I will usually shoot at ISO 200 to ISO 400 and stop the lens down to a minimum of f/7.1 and for great light f/8 or f/11. Most of the time I will target a maximum shutter speed of about 1/1000th, and then give the rest of the light to the f/stop setting. I shoot in Aperture mode almost all the time. The problem I have with shooting in Shutter Mode in these conditions is if I set it to 1/1000 and that produces around f/9 and then I move on to a shaded area, or a cloud passes over, etc, I might be at f/5.6 and 1/1000th, not what I would pick. While Aperture mode alone won't fix this problem, I guess I am just used to shooting and adjusting the f/stop when the light changes... The main thing this lens needs to perform well is the right f/stop and a decent shutter speed.
These setting will apply to just about any camera and lens combination, but for me on my D200 and D300 here's what I do. Generally I shoot wildlife, birds, moving subjects, etc.
Camera Settings
AF-C - Continuous-Focus mode - For moving subject you have to be in AF-C. Simple as that.
AF-C and AF-S mode - These two settings can be found under a1 and a2 and they need to be set to Focus Priority. When in Release Priority the camera will let you take out of focus images. I want my images IN focus.
JPG Compression Mode I use JPGs about 98% of the time for my images, and the compression mode makes a huge difference. Be sure to have this set for Image Quality, NOT File Size. Also, if you want the best JPG image possible from the camera make sure the camera is set to Large and Fine. If you shoot in RAW these settings don't apply. For me, the extra file overheard and processing time is almost never worth it.
Misc
VR - 99% of the time I use the VR in position 1, which only activates the VR when an image is taken. The other mode enables preview with VR on when the shutter is half-pressed. The two problems with this is it uses more battery power, and when panning it can result in things creeping out of the frame before you take an image. When on a tripod for long exposures I will turn off VR, and when on a tripod with fast shutter speeds I often start with it off, and then try some with VR on too.
Back lit subject - When something that is back lit and the exposure is adjusted for the front of the subject, like a bird on a branch, the chromatic aberration can be very noticeable. There's not much you can do, stop down a little, and shoot RAW and adjust the aberration via the RAW plug-in.
Lens Hood - Most of the time I use the lens hood. It will prevent light from creeping in from the side and messing up the image. It also acts as a good alternative to a protective UV filter, preventing the front element from coming in contact with anything.
Hand holding - Two things you can do to improve your shots: 1) don't hold the lens from the front element. This moves during focusing, and if you are holding it, you can restrict the movement and the lens' ability to focus. 2) remove the tripod mount, or flip it upside down so you can get an even grip on the bottom of the lens.
Focus Limiter I keep the focus limiter enabled at all times, unless I need to focus at a close distance, and then I turn it off. To enable the focus limiter so that only things at a distance are in focus, and so it won't hunt at a close distance, start by focusing on something far away. Then rotate the ring at the front of the lens to A-L for Autofocus-Limit. Then move the slider on the side of the lens to L. One thing I've noticed is that to temporarily allow close focus is that you can click the switch on the side and you can focus on near subjects.
So, if you have under $2k for a 400mm lens I think this lens is a great choice. If you have $5-10k and don't mind shooting from a tripod a lot, get a 300mm f/2.8, or 400mm f/2.8 or 500mm f/4. I've considered getting all of those lenses but for now have held off. I like the mobility of the small 400mm. If I were to be going on Safari in Africa or somewhere in Alaska I'd seriously consider buying a bigger and faster lens, or even renting one... But until then I'm happy with the Nikkor 80-400mmD VR lens.
-Jon
Read more On "Nikkor 80-400mm VR - Get The Most Out Of This Lens"!


Tuesday, May 13, 2008
Photo Edit Technique - Selective Sharpening
I was editing this photo, and thought to make it in to a quick guide to using selective sharpening.
This is the original photo with a crop already applied of a Blue Grosbeak taken at Bombay Hook NWR in Delaware. The original uncropped image was basically a bulls-eye composition, so I cropped it to place the bird off center and add room for the bird to be looking in to.
The first thing I did to edit it was adjust the levels a little moving both the white and black points towards the middle...
Next I made a copy of the image with the levels adjusted, and made a new layer out of that. I applied some Unsharp Mask (rough settings of 100, 1.5, 0) and then some Smart Sharpening. The problem with doing this across the entire image is that the background gets very grainy. It's already blurred and out of focus, so trying to sharpen it doesn't help at all.
So, the trick is to then add a layer mask to the layer that has the sharpening on it. Add the mask, fill it with black (click on the mask part of the layer, Shift-F5, select black,, hit enter.) This hides the entire layer. Then zoom in on the bird, and select the paint brush and the white color. Then you paint white in to the mask to reveal that part of the layer. All I wanted sharpened was the bird and the branch he was on. So, without any other layers visible but the sharpened one it would look like this with the mask applied:
(the mask can be improved here to reveal less of the background around the edge of the bird, but I did this quickly, and it probably looks fine. If I was going to print this I'd probably have refined the edges of the mask.)
Finally, making the lower layer visible (the one with level adjustments, but not sharpened) visible you get to see the soft background, and the sharpened bird.
This is a fairly simple technique to make part of an image sharper without changing areas that don't need the sharpening. Similar masking techniques can be used for a variety of things: selective contrast, selective lightening or darkening, etc.
With the images that I post I'm more likely to do selective levels adjustments, but this is a good technique and is worth keeping in mind when trying to post process an image.
View the final image posted here:
-Jon
Read more On "Photo Edit Technique - Selective Sharpening"!


 Posts
Posts


